This post was last updated on February 3rd, 2024
In Gloomhaven Jaws of the Lion there are 16 different types of monsters that can be fought in many ways. There aren’t really right or wrong paths to follow when it comes to facing an enemy, although you could take some tricks to defeat them quickly and avoid wasting turns (and consequently ability cards).
In this article I will give you a brief overview of the many Gloomheaven Jaws of the Lion monsters and a quick strategy on how to quickly defeat them.
I’m also writing a more detailed series of articles in which I’ll go through each monster and share some strategies. Be sure to check them out, I will keep this page updated every time a new article comes out!
If you haven’t completed the game you might want to stop before the SPOILER section as I will cover a few enemies that you will only encounter in the late game, so keep an eye for that section when scrolling down.
This post may contain affiliate links. If you click through and make a purchase, I will get a commission at no extra cost to you. See our Affiliate Disclosure.
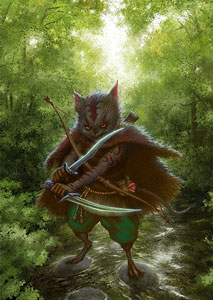
Vermling Scout
Enemy overview
Normal (lv.0 – lv.7)
- Hit points: 2 – 13
- Base movement: 3 – 4
- Base attack: 1 – 3
- Specials: –
Elite (lv.0 – lv.7)
- Hit points: 4 – 17
- Base movement: 3 – 5
- Base attack: 2 – 4
- Specials: –
One of the basic and pretty common enemies you will encounter in the campaign.
They are very weak if taken on a 1vs1 fight, but if you see more than one coming towards you – and you will – don’t underestimate the fight.
Thanks to the high mobility they could easily surround you and you will then be in serious trouble.
Brief strategy overview
The basic strategy against this type of enemy is pretty straightforward, try to always fight them one at a time using character movement and map obstacles to your advantage.
Don’t let them surround you.
If you want to know more about this enemy you can find some useful information in our Gloomhaven: Jaws of the Lion Vermling – Overview & Strategy Guide article.
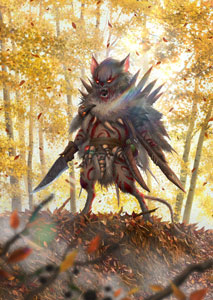
Vermling Raider
Enemy overview
Normal (lv.0 – lv.7)
- Hit points: 4 – 19
- Base movement: 1 – 4
- Base attack: 2 – 4
- Specials: –
Elite (lv.0 – lv.7)
- Hit points: 8 – 31
- Base movement: 1 – 4
- Base attack: 2 – 6
- Specials: –
One of the most common enemies you will find in the game since the first dungeon.
They have more hit points but less movement compared to the Vermling Scout and therefore is unlikely that they will manage to surround you.
Brief strategy overview
When they are at low levels, you should be able to kill them before they even reach you. When the difficulty of the scenario rises, you just need to be careful to not fight too many of them at the same time as they have really high hit points.
If you want to know more about this enemy you can find some useful information in our Gloomhaven: Jaws of the Lion Vermling – Overview & Strategy Guide article.
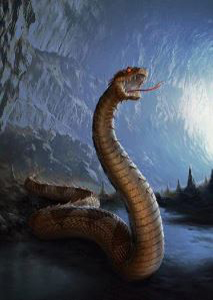
Giant Viper
Enemy overview
Normal (lv.0 – lv.7)
- Hit points: 2 – 10
- Base movement: 2 – 4
- Base attack: 1 – 3
- Specials: poison
Elite (lv.0 – lv.7)
- Hit points: 3 – 18
- Base movement: 2 – 4
- Base attack: 2 – 4
- Specials: poison
Giant Viper is another pretty common enemy with fairly low health and attack, but with a special ability to inflict the negative status poison when you receive damage.
Poison status: all attacks targeting your character gain a +1 attack bonus until healed.
Brief strategy overview
Try to lower their health from distance and finish them off from a close range with one hit to avoid them attacking you.
If you want to know more about this enemy you can find some useful information in our Gloomhaven: Jaws of the Lion Giant Viper – Overview & Strategy Guide article.
Zealot
Enemy overview
Normal (lv.0 – lv.7)
- Hit points: 4 – 16
- Base movement: 2 – 4
- Base attack: 2 – 5
- Specials: wound (from lv.3)
Elite (lv.0 – lv.7)
- Hit points: 7 – 26
- Base movement: 2 – 4
- Base attack: 3 – 7
- Specials: wound
Zealot. Only one word to describe them: annoying.
They are enemies you will be facing from the beginning and you have to be careful against them. They have good stats overall, they can hit you with both melees and ranged attacks and they can inflict you the negative status wound.
Wound status: your character suffers 1 damage at the start of each turn until healed.
Brief strategy overview
Try to fight them one at a time and attack with all you have. It’s important to kill them quickly as they are very dangerous.
If you want to know more about this enemy you can find some useful information in our Gloomhaven: Jaws of the Lion Zealot – Overview & Strategy Guide article.
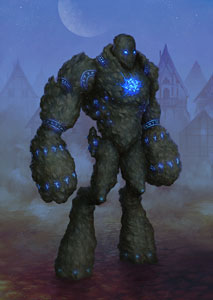
Stone Golem
Enemy overview
Normal (lv.0 – lv.7)
- Hit points: 10 – 16
- Base movement: 1 – 2
- Base attack: 3 – 5
- Specials: shield
Elite (lv.0 – lv.7)
- Hit points: 10 – 21
- Base movement: 2 – 3
- Base attack: 4 – 7
- Specials: shield
Stone Golems are very slow creatures with high health and attack.
These enemies can be tricky to fight in small rooms and when your character is at low levels since your base attacks aren’t normally strong enough to deal huge damage.
Shield special: the shield is a bonus ability that lets the Stone Golem suffer X* less damage when attacked (*shield value).
Brief strategy overview
The best way to deal with them is to apply negative status (such as wound) and drag them into traps as the shield doesn’t get activated when these monsters receive damage in those ways. You can then finish them off by throwing them all you’ve got.
If you want to know more about this enemy you can find some useful information in our Gloomhaven: Jaws of the Lion Stone Golem – Overview & Strategy Guide article.
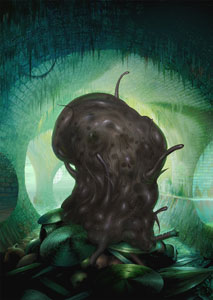
Black Sludge
Enemy overview
Normal (lv.0 – lv.7)
- Hit points: 4 – 16
- Base movement: 1 – 2
- Base attack: 2 – 4
- Specials: shield; poison
Elite (lv.0 – lv.7)
- Hit points: 8 – 18
- Base movement: 1 – 3
- Base attack: 2 – 5
- Specials: shield; poison
Black Sludges is a type of enemy that combines two of the specials we have encountered above in this list: shield and poison.
Their shield isn’t as high as Stone Golems’ one, in fact, it only reaches a value of 2. But this combined with the poison makes this monster very tricky to defeat without wasting time and precious cards.
Shield special: the shield is a bonus ability that lets the Stone Golem suffer X* less damage when attacked (*shield value).
Poison status: all attacks targeting your character gain a +1 attack bonus until healed.
Brief strategy overview
Try to take them down one at a time using a combination of ranged and melee attacks, without wasting too many turns.
Negative status such as poison or wound will also allow you to bypass the shield if bad luck doesn’t play against you when pulling their ability cards.
If you want to know more about this enemy you can find some useful information in our Gloomhaven: Jaws of the Lion Black Sludge – Overview & Strategy Guide article.
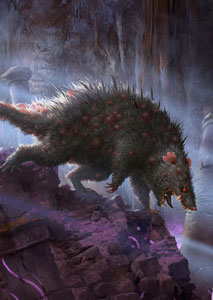
Rat Monstrosity
Enemy overview
Normal (lv.0 – lv.7)
- Hit points: 4 – 12
- Base movement: 1 – 3
- Base attack: 1 – 4
- Specials: on death, all adjacent figures suffer X damage
Elite (lv.0 – lv.7)
- Hit points: 6 – 16
- Base movement: 1 – 3
- Base attack: 2 – 5
- Specials: on death, all adjacent figures suffer X damage; advantage
Absolutely the worst creature anyone would probably like to see in the real world. A rat, but giant and monstrous.
In Gloomhaven Jaws of the Lion these monsters are pretty weak and the effect for which on death all adjacent figures suffer X damage makes them very fun to deal with.
Just be careful when you’ll face an elite type of these monsters as they have the advantage status which increases their chance to hit you.
Advantage: the attacker draws two attack modifier cards and applies whichever one is better.
Brief strategy overview
The funniest and best way to fight these enemies is by forcing them to be adjacent to each other and strike a couple of deadly attacks from distance. Their special ability will do the rest.
If you want to know more about this enemy you can find some useful information in our Gloomhaven: Jaws of the Lion Rat Monstrosity – Overview & Strategy Guide article.
Blood Monstrosity
Enemy overview
Normal (lv.0 – lv.7)
- Hit points: 7 – 20
- Base movement: 2 – 3
- Base attack: 2 – 5
- Specials: on death, all adjacent figures suffer 1-4 damage; shield
Elite (lv.0 – lv.7)
- Hit points: 12 – 23
- Base movement: 2 – 3
- Base attack: 3 – 6
- Specials: on death, all adjacent figures suffer 1-5 damage; shield
Very tough enemy to fight due to the high health and base attack combined with the special abilities.
Shield special: the shield is a bonus ability that lets the Blood Monstrosity suffer X* less damage when attacked (*shield value).
Brief strategy overview
Not worth fighting against them, it’s better to run.
If you want to know more about this enemy you can find some useful information in our Gloomhaven: Jaws of the Lion Blood Monstrosity – Overview & Strategy Guide article.
Black Imp
Enemy overview
Normal (lv.0 – lv.7)
- Hit points: 3 – 13
- Base movement: 1 – 1
- Base attack: 1 – 3
- Specials: poison
Elite (lv.0 – lv.7)
- Hit points: 4 – 19
- Base movement: 1 – 1
- Base attack: 2 – 4
- Specials: Attackers gain Disadvantage; poison
Black Imps are one of the Gloomhaven Jaws of the Lion monsters that can seriously make your adventure very difficult, mainly because of their ability cards.
They can strengthen and heal themselves and their allies, activate a shield and deal poisonous attacks from distance with a huge range (3). These abilities combined with the fact they usually spawn in groups, make this class of monsters really difficult to fight.
Poison status: all attacks targeting your character gain a +1 attack bonus until healed.
Disadvantage: the attacker draws two cards and applies whichever one is worse.
Brief strategy overview
Try to fight them one at a time preferably at close range, to give their many ranged attacks the disadvantage malus.
Running away is also a viable strategy thanks to their ridiculously low base movement; just be aware of the range of their attacks.
If you want to know more about this enemy you can find some useful information in our Gloomhaven: Jaws of the Lion Imp – Overview & Strategy Guide article.
Blood Imp
Enemy overview
Normal (lv.0 – lv.7)
- Hit points: 3 – 12
- Base movement: 2 – 4
- Base attack: 1 – 3
- Specials: muddle
Elite (lv.0 – lv.7)
- Hit points: 4 – 21
- Base movement: 2 – 4
- Base attack: 2 – 4
- Specials: muddle
The bloody version of the Imp. These are also swarming enemies that appear towards the mid-end game.
They share the same ability cards but instead of dealing poisonous attacks they inflict muddle status and so they are slightly less of a threat.
Muddle status: all of the character’s attacks gain Disadvantage.
Disadvantage: the attacker draws two cards and applies whichever one is worse.
Brief strategy overview
Try to fight them one at a time preferably at close range, to give their many ranged attacks the disadvantage malus.
Running away from them is a bit more tricky as they have better movement than the Black Imps.
If you want to know more about this enemy you can find some useful information in our Gloomhaven: Jaws of the Lion Imp – Overview & Strategy Guide article.
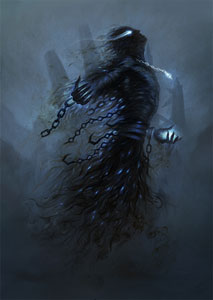
Living Corpse
Enemy overview
Normal (lv.0 – lv.7)
- Hit points: 5 – 19
- Base movement: 1 – 2
- Base attack: 3 – 5
- Specials: poison (from lv.6)
Elite (lv.0 – lv.7)
- Hit points: 10 – 29
- Base movement: 1 – 2
- Base attack: 3 – 6
- Specials: poison (from lv.5)
Living Corpses are very annoying monsters to fight due to their really high base attack and hit points (in the elite variant of the monster).
They can only do melee damage but they have few ability cards that can inflict a variety of negative status, therefore keep your distance!
Poison status: all attacks targeting your character gain a +1 attack bonus until healed.
Brief strategy overview
Ranged attacks against them are the way to go paired with inflicting them negative status, such as wound, for more damage.
Since they have very low movement it should be fairly easy to keep the distance.
Running away and avoiding the fight is also another viable strategy.
If you want to know more about this enemy you can find some useful information in our Gloomhaven: Jaws of the Lion Living Corpse – Overview & Strategy Guide article.
Living Spirit
Enemy overview
Normal (lv.0 – lv.7)
- Hit points: 3 – 12
- Base movement: 2 – 3
- Base attack: 2 – 4
- Specials: shield
Elite (lv.0 – lv.7)
- Hit points: 5 – 17
- Base movement: 3 – 4
- Base attack: 3 – 5
- Specials: shield
Living Spirits are monsters that attack from distance with a huge range (3-4) and can target all enemies. A couple of their attack are ice infused, which they can then consume to inflict the status disarm to the opponents.
Shield special: the shield is a bonus ability that lets the Stone Golem suffer X* less damage when attacked (*shield value).
Brief strategy overview
Try to fight them with melee damage in combination with ranged attacks or support abilities. Given their low health they should die pretty fast.
If you want to know more about this enemy you can find some useful information in our Gloomhaven: Jaws of the Lion Living Spirit – Overview & Strategy Guide article.
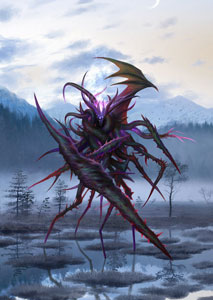
Chaos Demon
Enemy overview
Normal (lv.0 – lv.7)
- Hit points: 7 – 22
- Base movement: 3 – 4
- Base attack: 2 – 6
- Specials: muddle
Elite (lv.0 – lv.7)
- Hit points: 10 – 35
- Base movement: 4 – 5
- Base attack: 3 – 8
- Specials: muddle
Chaos Demons are the quintessence of the Gloomhaven Jaws of the Lion monsters. They are the scariest, most threatening and possibly the best looking monsters in the game.
Thanks to their high base movement/attack and their ability cards (which are totally insane), your characters will never be safe with them in the dungeon.
Muddle status: all of the character’s attacks gain Disadvantage.
Brief strategy overview
They are quite difficult to fight due to their high stats and the ability to infuse/consume elements. Try to attack with all you’ve got and kill them quickly if you want to avoid a blood bath.
If you want to know more about this enemy you can find some useful information in our Gloomhaven: Jaws of the Lion Chaos Demon – Overview & Strategy Guide article.
SPOILERS ahead. The last 3 monsters are Bosses and therefore stop reading here if you want to avoid any spoiler.
Blood Tumor
Enemy overview
Boss lv.0
- Hit points: 7xC
- Base movement: –
- Base attack: C-1
- Specials: immune to disarm, stun, muddle
Boss lv.7
- Hit points: 28xC
- Base movement: –
- Base attack: C+3
- Specials: immune to disarm, stun, muddle
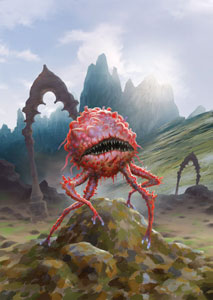
Blood Tumor is the first boss of the game and it will be encountered in the last tutorial scenario. You will face more than one of these enemies during the campaign and it is the easiest boss to fight.
This enemy will start a scenario with a certain amount of damage and if it can recover all its hit points the scenario will be lost.
This boss “Special” attacks are both Heal for himself or its Allies, allowing him to increase the percentages of its victory.
Brief strategy overview
Hit the Blood Tumor with all your best attacks and ignore whatever other enemy is in the room.
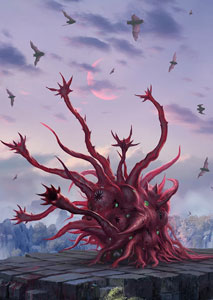
Blood Horror
Enemy overview
Boss lv.0
- Hit points: 7xC
- Base movement: 3
- Base attack: C-1
- Specials: immune to disarm, stun, muddle, immobilize
Boss lv.7
- Hit points: 28xC
- Base movement: 5
- Base attack: C+4
- Specials: immune to disarm, stun, muddle, immobilize
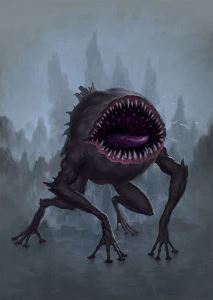
Blood Horror is a virulent mass of blood with dozens of creepy eyes, mouths with sharp teeth and tentacles ready to grab you, that jumps around the dungeon reviving allied Zealots or attacking your characters.
Much more difficult threat to deal with compared to the easier Blood Tumor, this Boss is no joke and you have to carefully plan your moves to win the fight.
Brief strategy overview
Very difficult boss to fight as he keeps moving throughout the dungeon. You need to firstly have a balanced team and choose your actions wisely to maximize the damage output for each turn.
Inflicting wound and poison will help in dealing more damage each turn.
First of the Order
Enemy overview
Boss lv.0
- Hit points: 10xC
- Base movement: 2
- Base attack: 3
- Specials: immune to disarm, stun, muddle, immobilize, curse
Boss lv.7
- Hit points: 36xC
- Base movement: 3
- Base attack: 8
- Specials: immune to disarm, stun, muddle, immobilize, curse
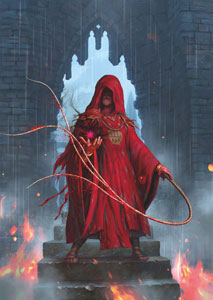
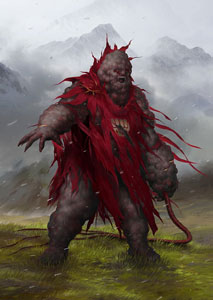
The First of the Order is the final Boss of the story. He can slash multiple attacks at once and summon Blood Imps to help him kill you.
He is also immune to many negative statuses and he has balanced statistics, which makes it theoretically very difficult to fight.
I’m saying theoretically because he has a very big flaw: the lack of movement.
Brief strategy overview
Keep your distance from him and attack with your best offensive cards. Fight him in close range when you’re sure to deal deadly damage.
Inflicting wound and poison will help in dealing more damage each turn.
Quite a disappointing Boss fight, too easy in a way.